Build guide
Flip-down mount for the kitchen tablet
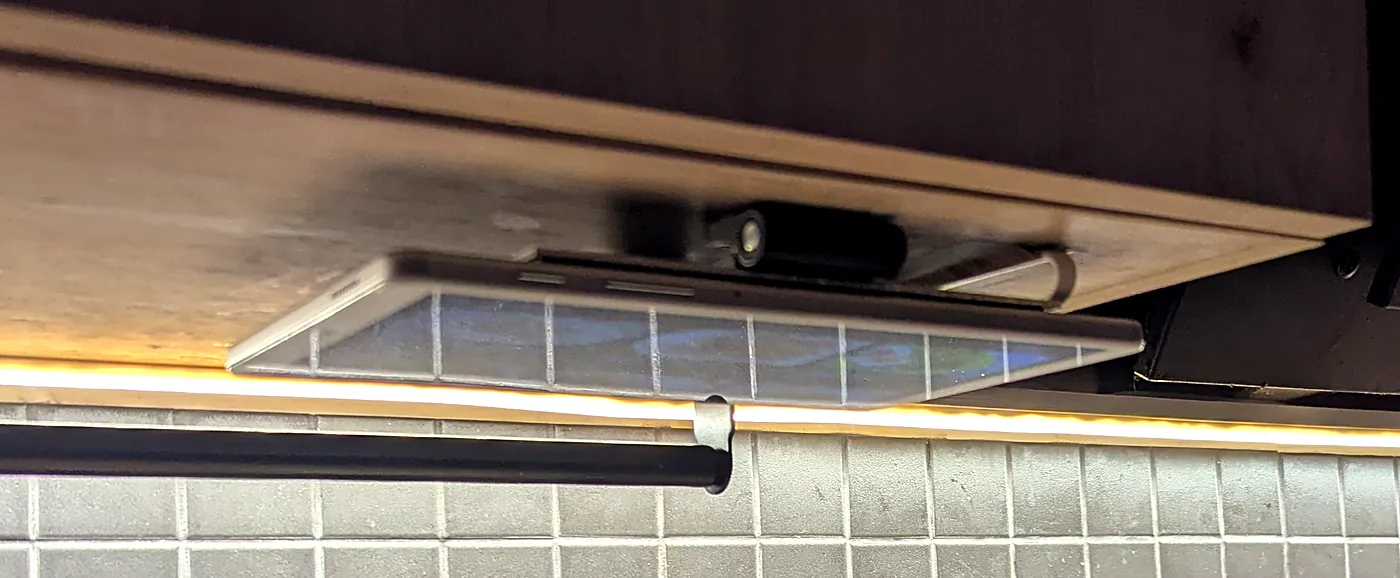
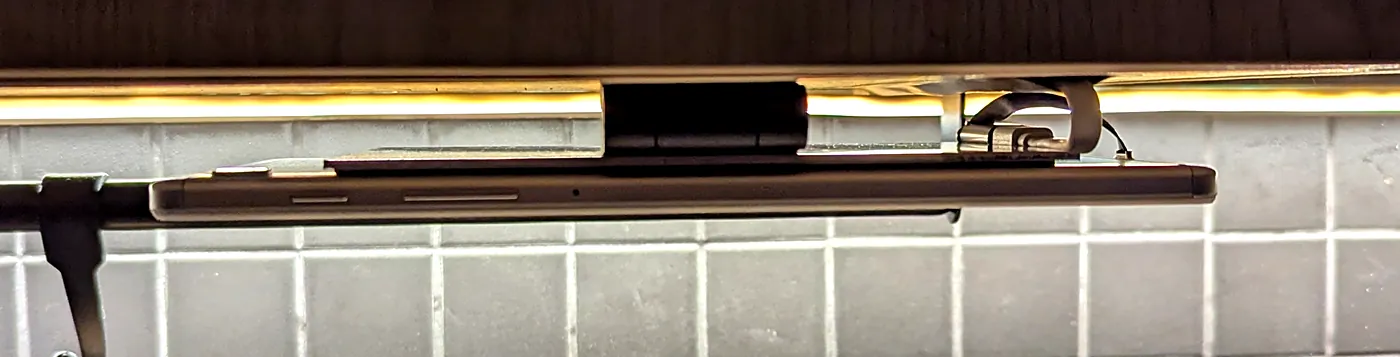
A tablet hangs from a friction hinge under the wall cabinet. Flip it down to cook, and afterwards it disappears flat under the cabinet floor. No holes in the tablet: a small aluminium plate carries the load.
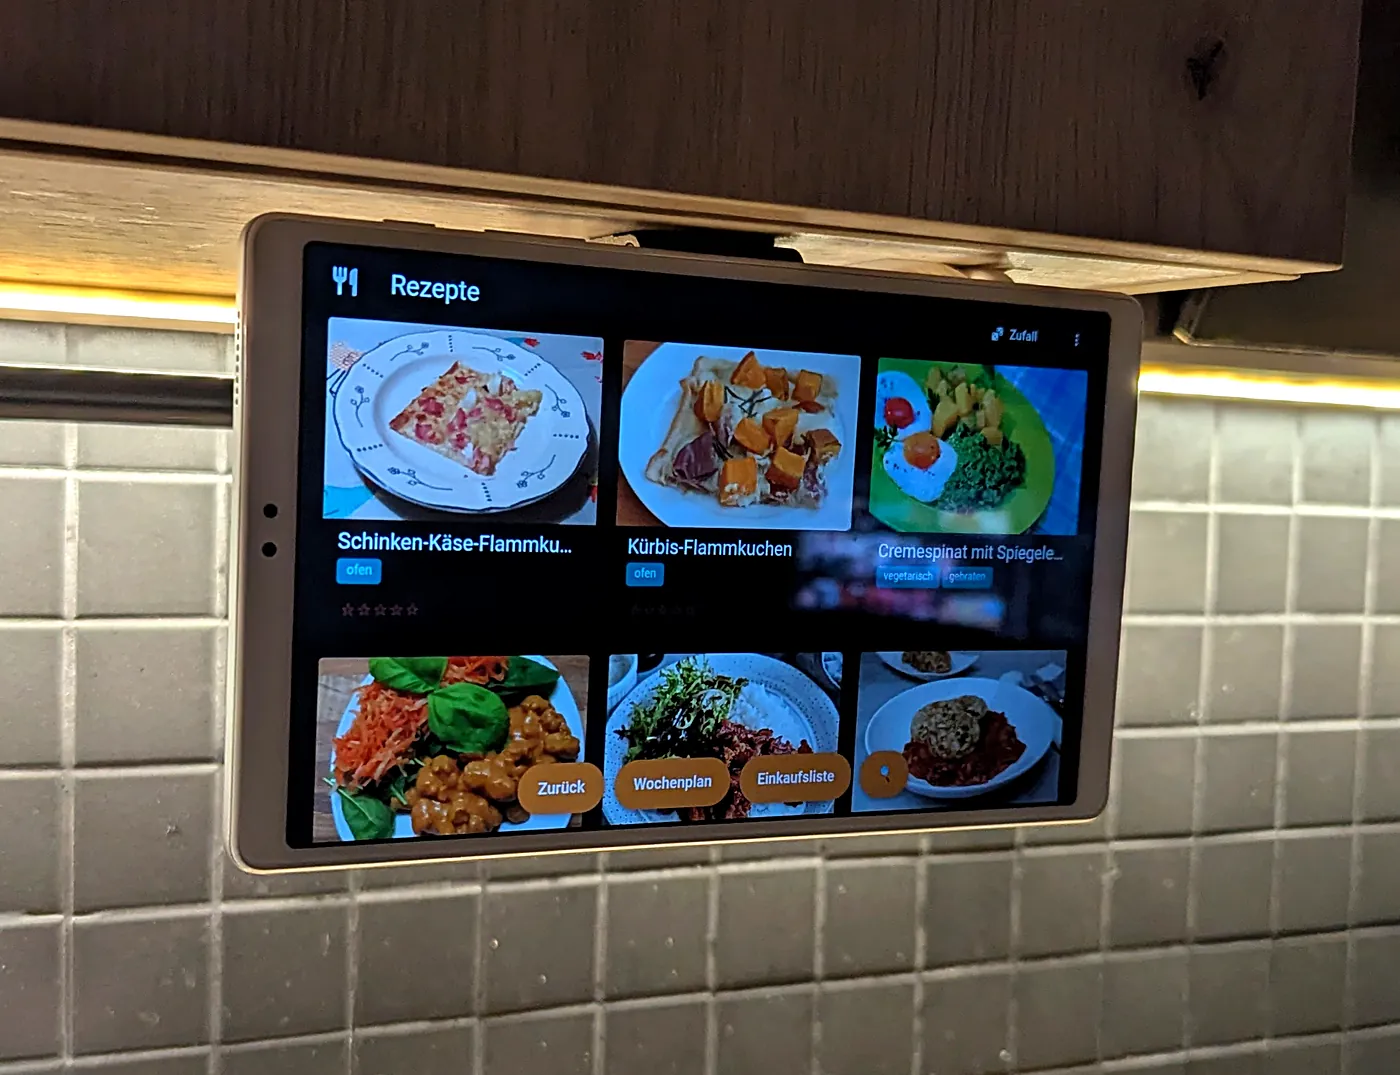
- Tablet
- Galaxy Tab A7 Lite (SM-T220), 366 g
- Hinge
- Ganter GN 437, 40 mm, adjustable friction
- On the tablet
- glued only, nothing drilled
- Power
- permanent via USB-C
How it works
- A 2 mm aluminium plate is glued to the back of the tablet. The hinge is screwed to this plate, not to the tablet. So the force from flipping spreads over almost the whole back.
- The second leaf of the hinge is screwed to the cabinet floor. The friction in the hinge holds the tablet in any position.
- Flipped up, a pot magnet in the cabinet floor holds a steel disc on the plate. The tablet then lies flat, display facing down.
- A flat cable and a USB-C coupler stay fixed on the tablet. Only the charging cable moves, in a short loop over the axis.
- A custom app uses the accelerometer to tell whether the tablet is up or down, and turns the display off and on. Details below.
Why a plate
Parts
| Part | Purpose | Qty |
|---|---|---|
| Ganter GN 437-ZD-40-40-A-SWfriction hinge, zinc die-cast, 40 × 40 mm | Pivot | 1 |
| Aluminium plate 6061, 2 × 100 × 150 mmWinfox, cut to size | Carrier on the back of the tablet | 1 |
| 3M VHB 5952F19 mm × 3 m, 1.1 mm thick | Glues plate and coupler to the tablet | 1 roll |
| Pot magnet 25 mm with hole, with steel discsBFANGZ, pack of 10, self-adhesive discs | Holds the tablet flipped up | 2 magnets, 1 disc |
| USB-C flat cable, 90° on both endsDAOKAI, 75 mm and 150 mm in the set | Tablet to coupler | 1 (75 mm) |
| USB-C coupler, female to femaleTolesum, 27.5 × 15 × 8 mm, pack of 2 | Joins the charging cable | 1 |
| Charging cable USB-A to USB-C, 2 mMOOOV 732060, white | To the wall socket | 1 |
| Countersink HSS 10.4 mm, 90°AM-Zerspanungstechnik | Tool: countersink for the screw heads | 1 |
From the parts bin
- 2 countersunk screws M3, about 16 mm
- 2 washers M3, 2 nuts M3 (self-locking is better)
- 2 wood screws for the hinge
- 1 wood screw for the magnets
- USB-A power supply
- Self-adhesive furniture film in the cabinet's finish
- Drill, 3.2 mm metal bit, wood bit for pilot holes
- 2.5 mm hex key, screwdriver, isopropyl alcohol
Build
Before you start: Screw plate and hinge together first, then glue them to the tablet. Nothing is drilled on the tablet itself. The VHB tape needs a day before it carries full load.
-
Mark the plate
Lay the hinge flush with one long edge of the plate, centred. Mark the hole centres through the two holes of the leaf. This edge later goes to the long tablet edge the tablet pivots on.
-
Drill and countersink
Drill through the plate with 3.2 mm. Then countersink from the side that goes onto the tablet, until the screw head sits flush.
Check: Run a fingernail over the countersink. Nothing may catch, or the head presses on the tablet.
-
Screw the hinge to the plate
Push the M3 countersunk screws from the tablet side through plate and leaf, washer and nut on top. Tighten firmly: the M3 has play in the leaf's hole, only the clamping holds it.
The bolt comes from the underside of the plate, the nut sits on top of the leaf. The plate has no thread: nut, leaf, plate and bolt head are clamped together. Why M3: The sheet must be at least as thick as the bolt head is high. An M3 countersunk head (1.7 mm) fits in 2 mm; M5 (2.8 mm) would need 3 mm. Otherwise the countersink cuts through and leaves only a knife edge. The load is small: about 0.22 N·m to hold, at most about 2 N·m of friction on two bolts.
-
Glue the plate to the tablet
Degrease the tablet back and the plate with isopropyl alcohol. Lay VHB strips side by side on the plate, almost full surface. Set the plate flush with the pivot edge and centred on the long side, under the hinge. Press hard.
Wait: per 3M, 50 % bond strength after 20 minutes, 90 % after 24 hours. Mount it the next day.
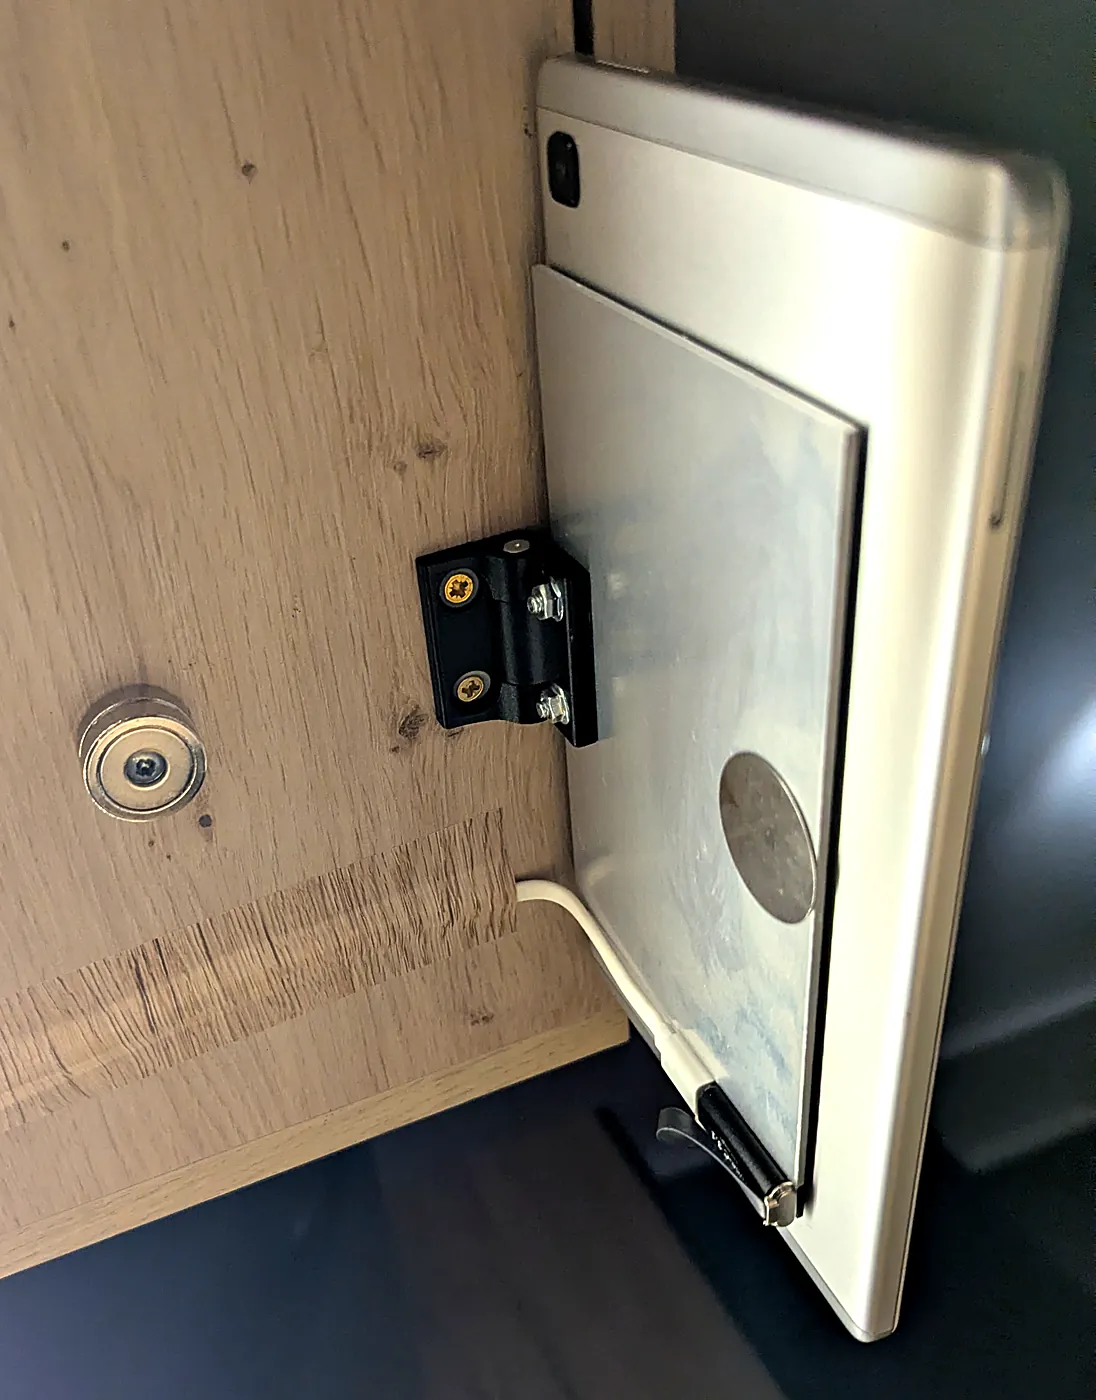
Fully mounted, back side: plate, hinge, steel disc, magnet and cable. -
Stick on the steel disc
Stick the self-adhesive disc from the magnet set onto the plate, near the corner opposite the hinge. There the magnet has the longest lever.
-
Cable on the tablet
Plug the 75 mm flat cable into the USB-C port and fold it flat towards the back. Glue the coupler with VHB in the strip next to the plate and plug in the flat cable. The charging cable goes into the coupler. So no pull acts on the tablet's port.
-
Screw the hinge to the cabinet
Hold the tablet flipped up under the cabinet and align it. Hold the free leaf against the cabinet floor near the front edge, drill pilot holes and fix it with two wood screws.
Note: Screwing into the cabinet is not recommended. Glue hinge and magnets to the cabinet floor instead. I screwed them anyway.
-
Fit the magnet
Stack two pot magnets and screw them into the cabinet floor with one wood screw, exactly above the steel disc. The stack makes up for the height of the hinge, so the tablet lies straight when flipped up.
Check: Flip it up. The disc snaps to the magnet and the tablet stays up.
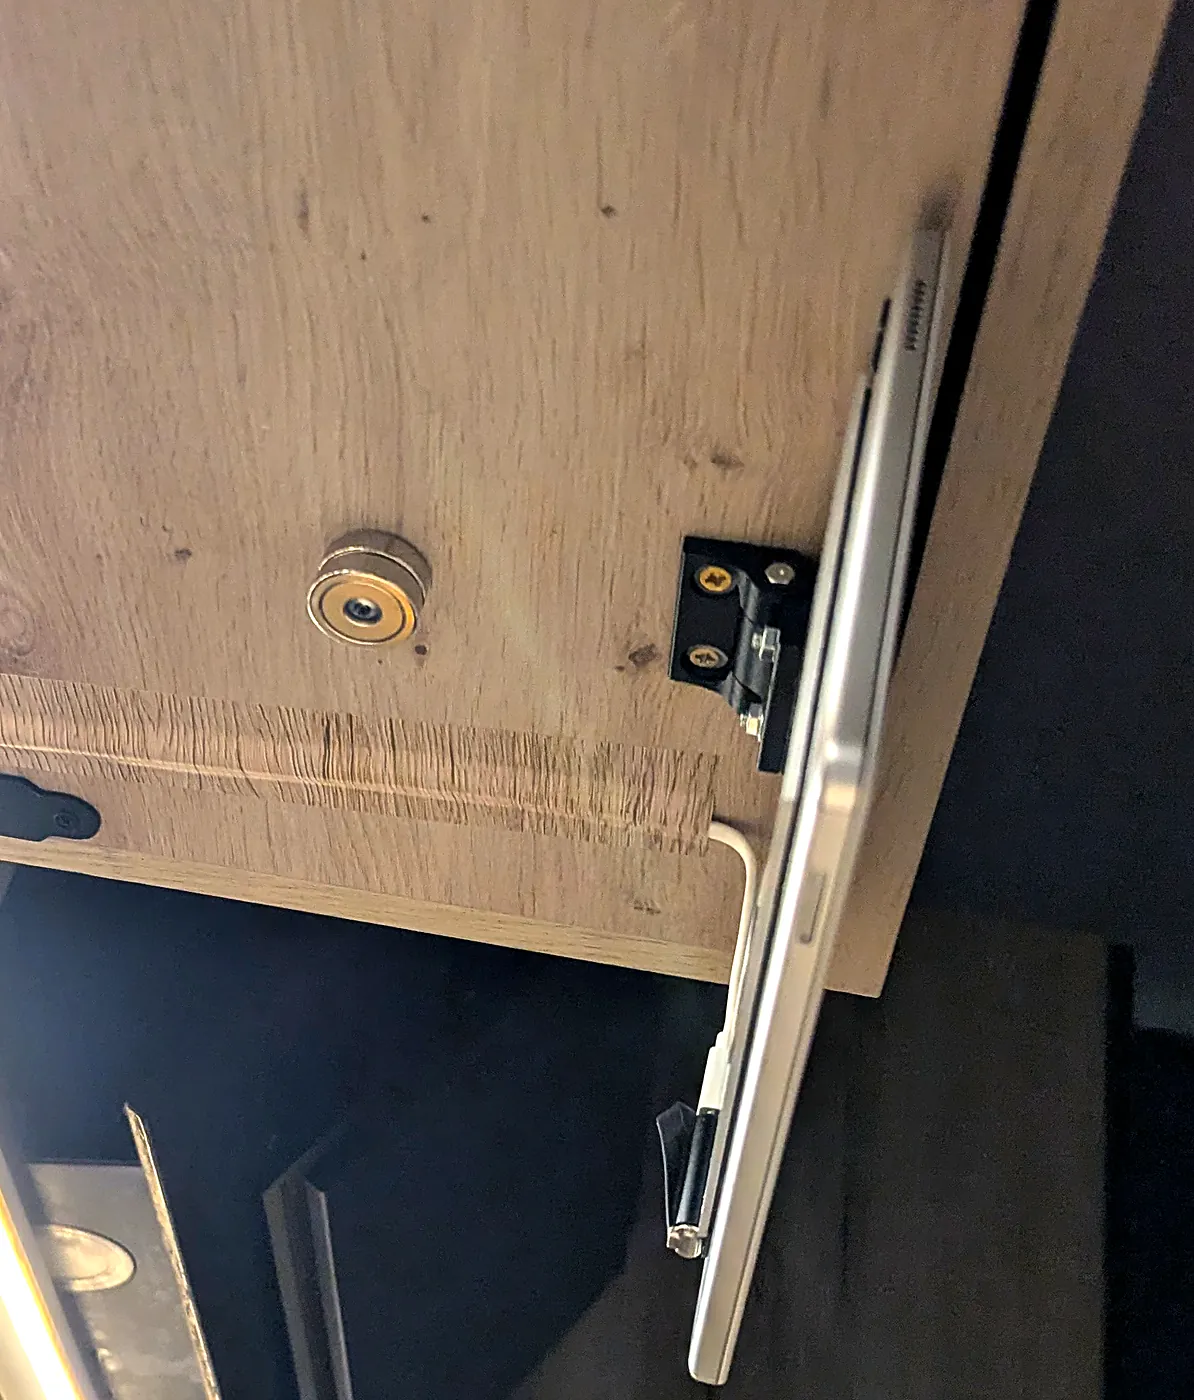
From below: magnet stack in the cabinet floor, hinge at the front edge. -
Route the charging cable
Lead the charging cable in a short loop over the axis, then along the underside of the cabinet to the wall. Cover it with furniture film in the cabinet's finish, so it is hard to see. The USB-A power supply goes at the end.
Check: Flipped up, the cable lies next to the tablet, not under it.
-
Set the friction
Loosen the adjusting screw on the hinge (2.5 mm hex) a lot, then tighten it in small steps until the tablet holds every position. At most 0.5 N·m.
Check: The tablet stays where you put it and moves with light pressure. If it sinks: a bit tighter. If it is stiff: loosen a bit.
Cable route
As built: flat cable and coupler fixed on the tablet, the charging cable in a short loop over the axis and then along the underside of the cabinet to the wall, covered with furniture film in the cabinet finish. No woodwork, no extra screws. Routed as in the step "Route the charging cable".
Alternative: cable channel instead of film
Same route, but a slim cable channel in the cabinet colour instead of the film. Not built; the drawing is a plan.
Tested
- passedMagnet: Flipped up, the disc sits on the magnet and holds the tablet up.
- passedFlipping: Flipped more than 20 times, charging does not drop out.
- passedCharging: Power supply detected the whole time, battery from 30 % to 42 % in 29 minutes. Display on for the first 12 minutes.
- passedDisplay: Flipped up, it turns off after about one second and stays off. Flipped down, the recipe app is there at once.
The app: display off when flipped up
The tablet runs as a kiosk with a custom Android app. It is the home screen and shows the recipes from a self-hosted Mealie instance. The code is not published, so here is how it works, for your own build.
Detect the position. A foreground service reads the accelerometer, also with the display off. A partial wake lock keeps the CPU awake for this. From the gravity vector it computes the angle between display and floor: 0° means flat with the display facing down, 90° means vertical.
Switch with hysteresis. From 50° the tablet counts as flipped down, below 40° as flipped up. The angle must be stable for 400 ms. So nothing switches when you tap the screen or while it swings.
Turn off. Flipped up, the app calls DevicePolicyManager.lockNow(). For this it is a device administrator, but only with the force-lock policy.
Turn on. Flipped down, a short wake lock (FULL_WAKE_LOCK with ACQUIRE_CAUSES_WAKEUP, 3 s) brings the display back. Then the app restarts its activity. The activity may sit above the lock screen (setShowWhenLocked) and keeps the display on while it is visible.
Trap: The activity must not also set setTurnScreenOn(true). Every restart of the activity re-arms this flag. On the next lockNow() the lock screen appears, the activity becomes visible above it and turns the display back on 14 ms later. Measured on this tablet.
Setup via adb
adb shell cmd role add-role-holder android.app.role.HOME <package> 0
adb shell dpm set-active-admin <package>/.LockAdmin
adb shell settings put global stay_on_while_plugged_in 0
adb shell dumpsys deviceidle whitelist +<package>
adb shell pm grant <package> android.permission.POST_NOTIFICATIONS
adb shell appops set <package> SYSTEM_ALERT_WINDOW allow
- Home screen
- The app starts by itself after every reboot and brings the sensor service with it.
- Device admin
- Needed for
lockNow(). Without it the display simply stays on. - stay_on_while_plugged_in
- Must be 0. Otherwise the permanently connected charging cable keeps the display on.
- Battery exemption
- So Android does not put the service to sleep.
- Notifications
- Samsung cancels the wake-up if the app may not post notifications.
- Overlay permission
- Without it Android blocks the activity start from the service. The display then lights for 3 s and goes off again.
Permanent power is not a problem, because Samsung's battery protection stops charging at 80 %.
Technical appendix
- Hinge GN 437, 40 mm, centred on the pivot edge. Hole spacing 25 mm.
- Aluminium plate 100 × 150 × 2 mm, flush with the pivot edge, centred.
- Steel disc for the magnet stack.
- Flat cable 75 mm from the USB-C port.
- USB-C coupler, glued with VHB.
- Charging cable 2 m, loop over the axis.
- Camera stays free.
- Holding torque
- about 0.22 N·m (366 g, centre of mass about 62 mm from the axis), calculated
- Hinge friction
- up to about 2 N·m, so plenty of reserve. That is why it needs fine adjustment.
- Why flush
- The hinge holes sit 12.5 mm from the axis. Flush with the edge they sit about 11 mm deep in the plate, enough material around the 3.2 mm holes.
- Why M3
- An M3 countersunk head is 1.7 mm high and fits in 2 mm sheet. M5 would need 3 mm, otherwise only a knife edge is left.
- Why a plate
- A leaf glued straight to the tablet would be peeled off at its front edge with every flip. The plate spreads the load over almost the whole back.